A Really Short Introduction to Ebook Creation and Distribution with Ulysses and iBooks
Have you ever thought about publishing your texts, but never put that thought into action? Well, you could probably tackle that job right now – it is easier than you think! Let me walk you through the process step by step.
Note: You can use either Ulysses for Mac or Ulysses for iPad to create your ebook. For publishing it with iBooks, however, you’ll need a Mac running OS X 10.9 or later. And – this should go without saying – you have to hold the copyright for the content you publish.
1. Sign Up for iTunes Connect
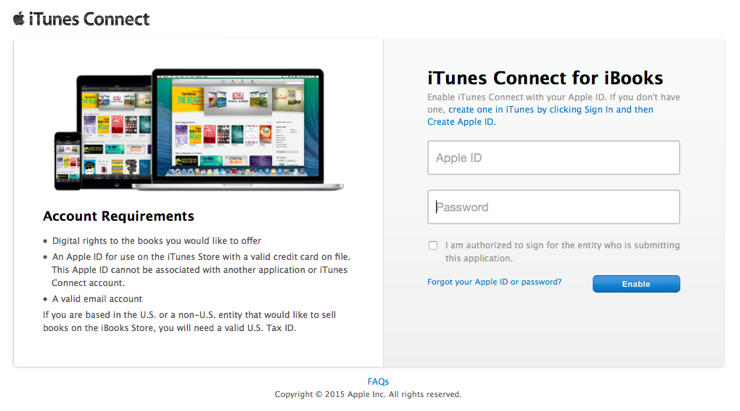
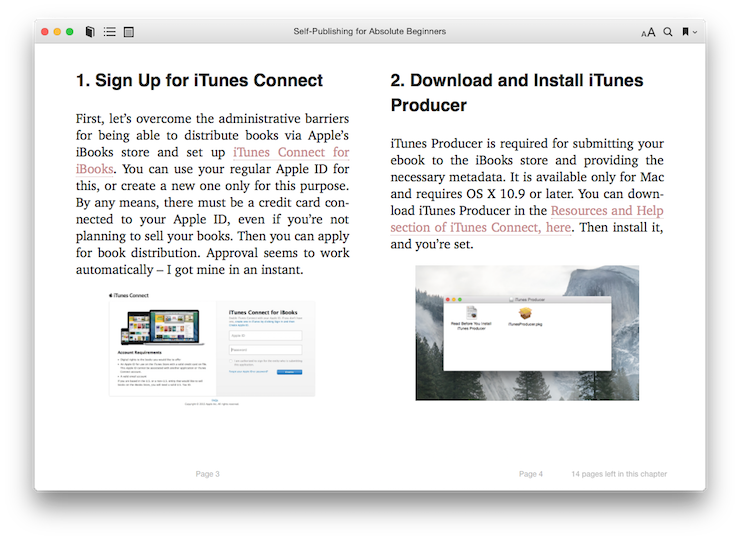
First, let’s overcome the administrative barriers for being able to distribute books via Apple’s iBooks store and set up iTunes Connect for iBooks. You can use your regular Apple ID for this, or create a new one only for this purpose. By any means, there must be a credit card connected to your Apple ID, even if you’re not planning to sell your books. Then you can apply for book distribution. Approval seems to work automatically – I got mine in an instant.
2. Download and Install iTunes Producer
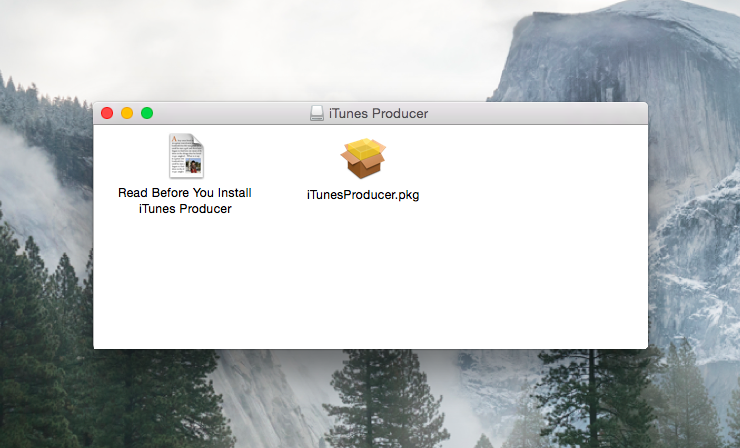
iTunes Producer is required for submitting your ebook to the iBooks store and providing the necessary metadata. It is available only for Mac and requires OS X 10.9 or later. You can download iTunes Producer in the Resources and Help section of iTunes Connect, here. Then install it, and you’re set.
3. Write Your Book With Ulysses
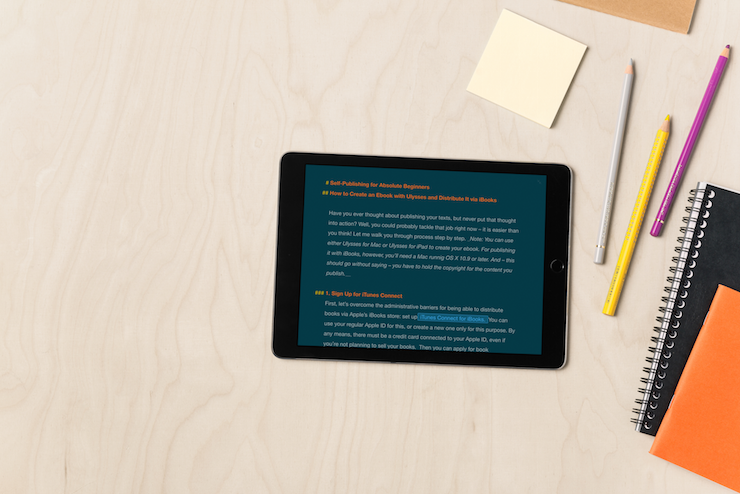
Now for the fun part! With Ulysses, you can write in a focused environment, customized according to your taste. You can write headings of different levels, emphasize text passages, add footnotes and much more, without having to worry about the formatting at this moment. For organizing your book, you may want to use one sheet for every chapter or scene you write. You can freely move your sheets around to bring them into a new order at any time.
It is not necessary to tell a story of epic length to publish it on iBooks. Other than the average printed book, an ebook can be 10 or 1.000 pages long – it only depends on the subject. You should have your reader’s expectations in mind, though, and aim to comply with it. As an example, they’ll anticipate a novel to count more than 50.000 words, or even 80.000 to 100.000. If your prose is much shorter, you should think about labelling it accordingly, e.g. a short story or short novel.
I finished my first ebook “Self-Publishing for Absolute Beginners: A Really Short Introduction to Ebook Creation and Distribution with Ulysses and iBooks” in just a couple of days (with breaks), and it has a length of only 5 pages. I decided to add “A Really Short Introduction” to the subtitle to manage the reader’s expectations.
4. Add Images
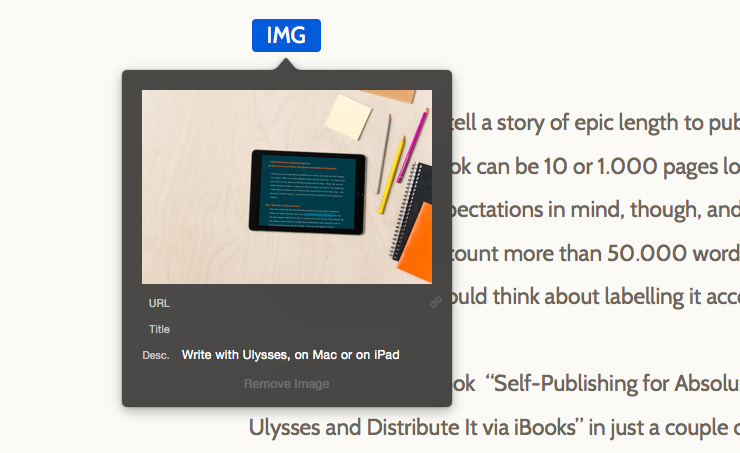
Images are essential for many non-fiction books (not so much when writing, say, a novel). They can visually support your statements, help explain complex issues or add a certain atmosphere to your writings. Select your images with care, and provide for good quality. The iBooks app will scale your image down to the available page width depending on the current window size, and provide the reader with a full view when double-clicking or double-tapping an image, respectively.
If you can access your images directly via Finder, you can just drag and drop them into a Ulysses sheet to put them where they belong in the order of a text. If an image is stored with Apple’s Photos app, that’s not possible, but you can still copy and paste to put it in place.
If you’re working on the iPad, use the image tag in Ulysses’ button row to add an image. Then you can either choose one from your library, import it from external sources such as Dropbox, or take a photo with your camera.
For any image added to Ulysses you can optionally provide metadata: double-click (or double-tap) the image tag to edit them. For the purpose of publishing an ebook, the field for the image description may be of interest , since it will get displayed as image caption. (Side note: The title will display in iBooks for Mac, when readers move their mouse over an image. The URL field is not relevant for ePub export.)
5. Prepare for Publishing: Book Title, Cover, and Description
If you haven’t thought about your book’s title or its cover and description yet, you should do this now. Here is a list of ideas on how to come up with a book title. If you’re a writer of genre fiction, you could also try your luck with book title generators: Here is one for love stories, and one for thrillers. Their random character makes for some mystic fuzziness.

For the titles of my blogposts, I usually write down a couple that come to my mind and then decide on the one I think fits best. Sometimes I ask a fellow Soulman or -woman for help, and sometimes they offer their help with this even without being asked.
The book cover must be a PNG or JPEG image and at least 1400 pixels wide on the shortest side. Portrait format is not required, but very common, so a size of 1400 x 1873 would be a good choice.
For submission, you’ll also need a book description of at least 50 characters. It could contain a summary, a teaser or an enthusiastic quote – think of it as the back cover text of a printed book. You don’t have to include it into the ePub file of the book, but have it at hand for copy and paste.
6. Make your ePub File with Ulysses for Mac…
This is a big moment for Ulysses’ Quick Export feature. Select the sheets that belong to your book, click the export button in the toolbar and select ePub export.
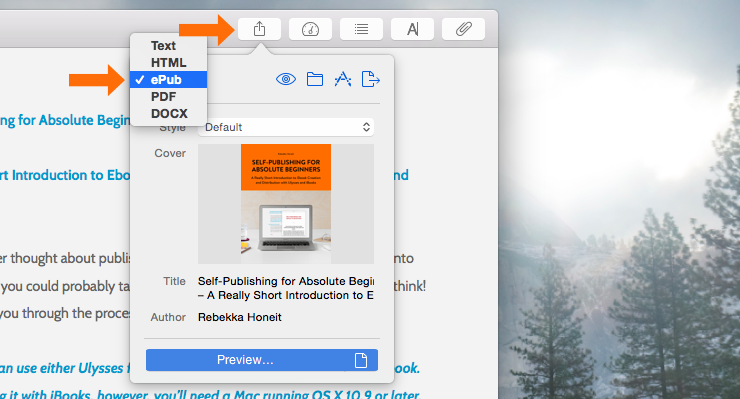
Now you can add author and title as well as drag & drop your cover image. You can also select between different formatting styles for your book – click preview to compare between them.
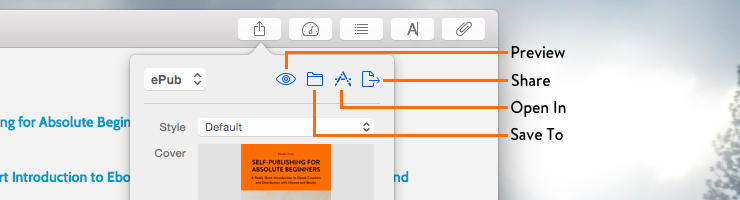
If you’re set, you should open your ePub file in the iBook application for a final revision.That way, you can see exactly what potential readers are going to see.
For publishing, however, you will have to go back to Ulysses and use Quick Export to save your ePub file to disk.
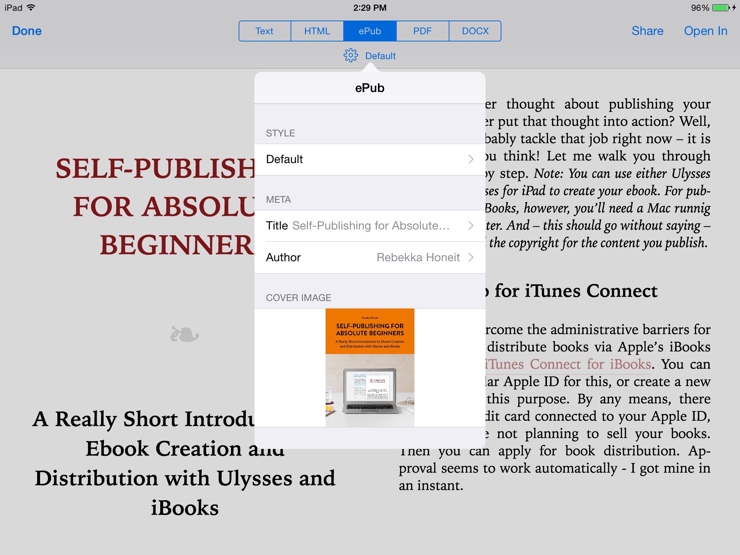
7. …or use Ulysses for iOS
With Ulysses for iOS, it works quite similarly: Tap the export icon and select ePub export. You’ll instantly get a preview. For adding a cover image, a title and so forth, you’ll have to tap the gear icon. Via Open In you can send your book to iBooks. For providing the ePub file for further processing, use Share and export to iCloud Drive or another storage service, or send yourself an email.
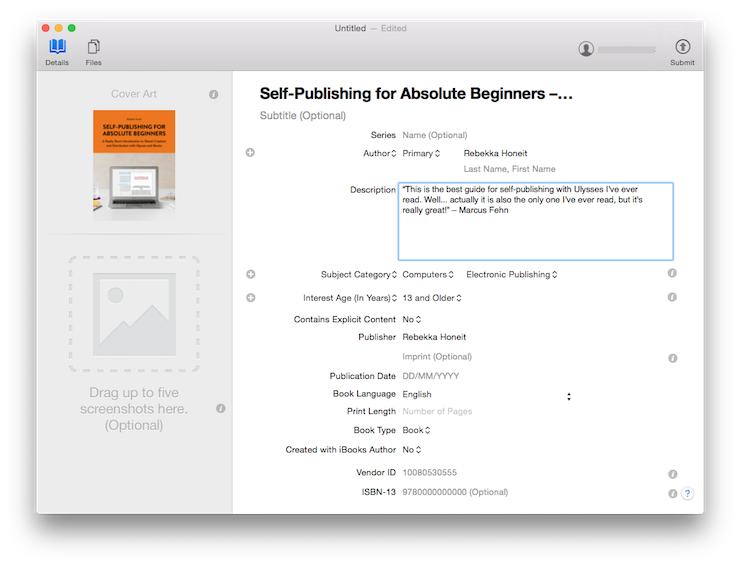
8. Submit Your Book with iTunes Producer
You’re almost there! Open iTunes Producer, select Files and drag in your ePub file. Then carefully complete the submission form. Paste the description you prepared, and add your cover art. If you’re not selling your book (i.e. you’re giving it away for free), an ISBN number is not required. You can also add a separate ePub file as a sample book, but that’s not mandatory – if you don’t, the sample will get created automatically from your original book. Click submit top right – and there you go. Your book should now be processed for submission, and, if everything is fine, get submitted to the iBooks store for review.
9. Your Book on iBooks
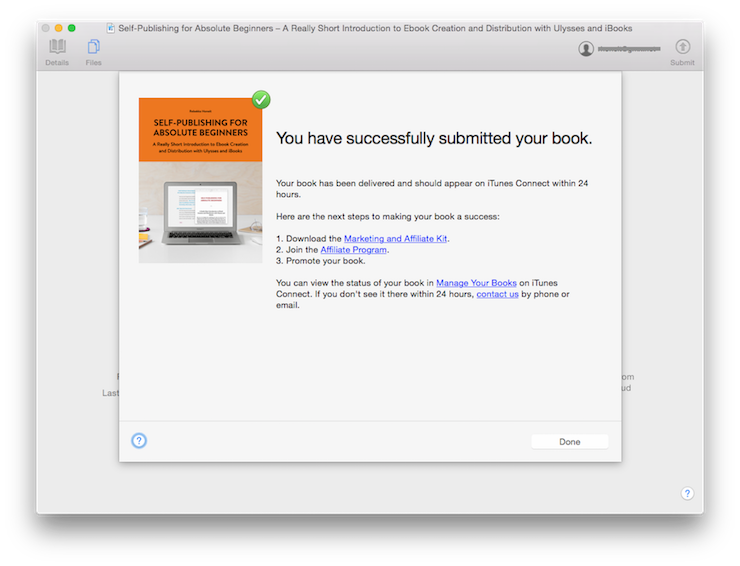
According to the rumors, review can take up to a couple of workdays. You can check the status of book in iTunes Connect at any time, and you will get an e-mail alert when it is finally available in the stores.
And then you’re a published author.