
Eline, originally from The Netherlands, is currently doing an English Language and Linguistics Master and is a member of The Soulmen’s support team. In her column, she responds to some of the most frequently asked questions and shares support answers that could be of interest for more Ulysses users out there.
Importing Your Works From Scrivener
Peter recently asked how he could import his works from Scrivener into Ulysses. As both apps take a different approach to writing, there are some steps involved to migrate your texts to Ulysses. Here’s how it’s done.
Scrivener saves your works in project files (.SCRIV) but Ulysses can’t handle these files directly. You can still get your works into Ulysses though: by exporting them as DOCX files in Scrivener first.
On Mac
Open Scrivener and reveal your Binder by going to the menu item “View › Layout › Show Binder”. Then select your entire project:
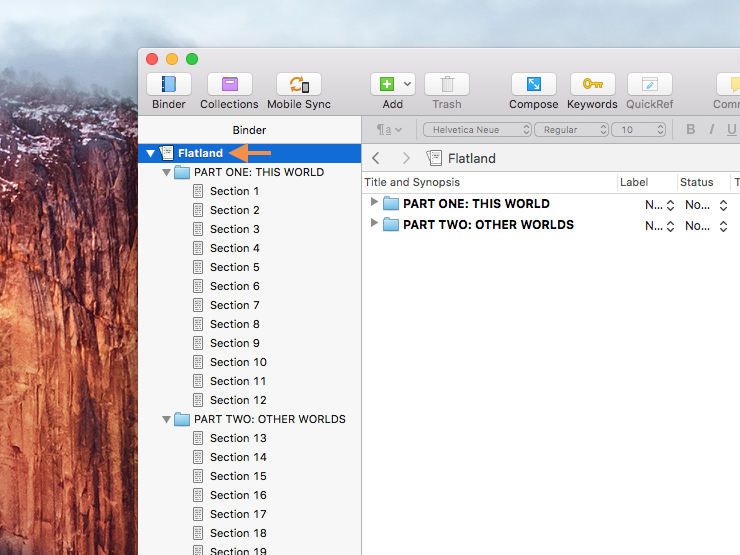
Now you can export your project via “File › Export › Files…”. Choose DOCX as a format and a storing location. Scrivener will then create a folder which you can simply drag into Ulysses’ library. This will make a group for the project folder and sheets for your texts.
Please note: Ulysses can’t import images inside DOCX files created by Scrivener. That is, if your files contain images, you’ll have to open Scrivener’s DOCX files in Microsoft Word first. In Word, go to “File › Save As…” and make sure to uncheck “Maintain compatibility with previous versions of Word” when saving your file. Then you can drag the newly saved DOCX files into Ulysses’ library and your images will be retained.
EDIT: Rafael Ontivero emailed me about another way of transferring your DOCX-files from Scrivener to Ulysses, which does in fact retain the images.
In order to do this, open Scrivener and select your Binder just as I’ve described above. Then, go to “File › Export › Files…” and select the format “Rich Text With Attachments (.rtfd)” and a place to store them. Then, drag the resulting folder into Ulysses’ library and your works will be imported automatically, including all images. Thanks Rafael!
On iOS
After opening Scrivener, choose the project you’d like to export from the main screen. As a next step, tap the “Export All” button in the lower-left corner of the screen:
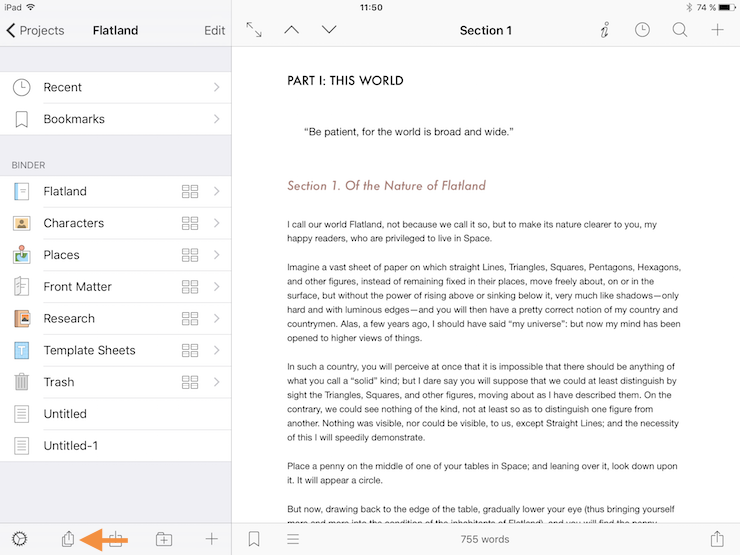
In the export panel, select Word as file format. After you tap “Compile”, you’ll see a preview of the finished document. Now tap on the app icon in the top-right corner, and, as a last step, select “Copy to Ulysses”: this will automatically open Ulysses for you, placing your project in the Inbox as one single sheet.
Unfortunately, there is currently no way of getting your images into Ulysses on iOS. Also, Scrivener for iOS can currently only export your project as one single file.
Pasting Text Snippets Smarter
In a follow-up on my latest column on writing technical documentation, Jesse asked us about pasting code. Ulysses offers a feature called Smart Paste, allowing users to easily handle different kinds of text snippets.
If you copy text from anywhere to the clipboard, Smart Paste will recognize the text’s formatting and can automatically convert it for you during insertion. For example, copy the following snippet:
The Ulysses website can be found here.
Then, insert it by pressing ⇧⌘V (shift-command-V). You’ll see a number of options you can choose from:
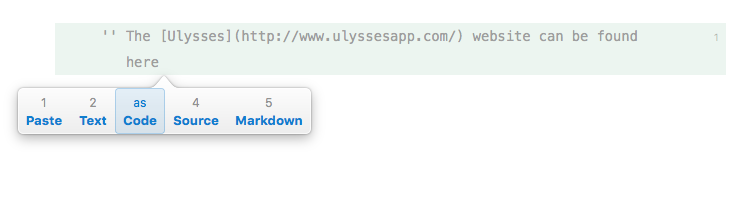
Per default, Ulysses will detect what kind of snippet it’s dealing with and offer to convert it into the proper Ulysses syntax. You can also choose to paste it the normal way (1), without any formatting (2), as a code block (3), or as a raw-source block (4). In the example above, choosing the third option “as Code” will automatically create a code block for you.
For the time being, Ulysses doesn’t offer Smart Paste on iPad or iPhone yet. Adding this is on our to-do list though.
Do you have a question about Ulysses yourself? Please don’t hesitate to get in touch via our Contact Form, Eline and her colleagues from the Ulysses support will do their best to help you out.