I have written all my posts for our Ulysses blog in Ulysses, of course. Until recently, I used to copy a post’s text as HTML code, then paste it to the WordPress backend online. This worked ok – but with Ulysses’ WordPress integration, it is now WAY easier. I write and organize my articles with Ulysses, and once I’m ready to publish, it takes me only a few clicks for a browser preview. Here is a wrap-up of how it works.
On Mac
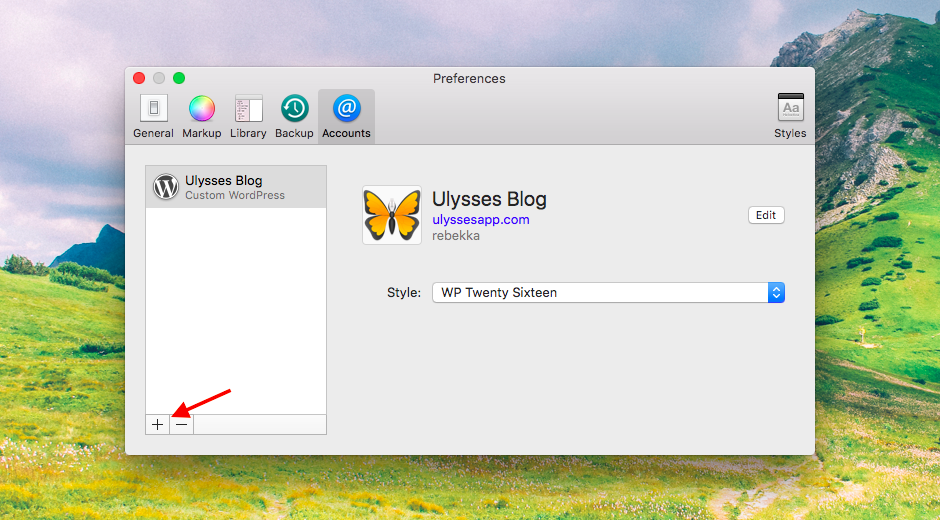
Before you can start publishing, you’ll have to connect your WordPress account with Ulysses. On Mac, you can do so via “Preferences › Accounts”.
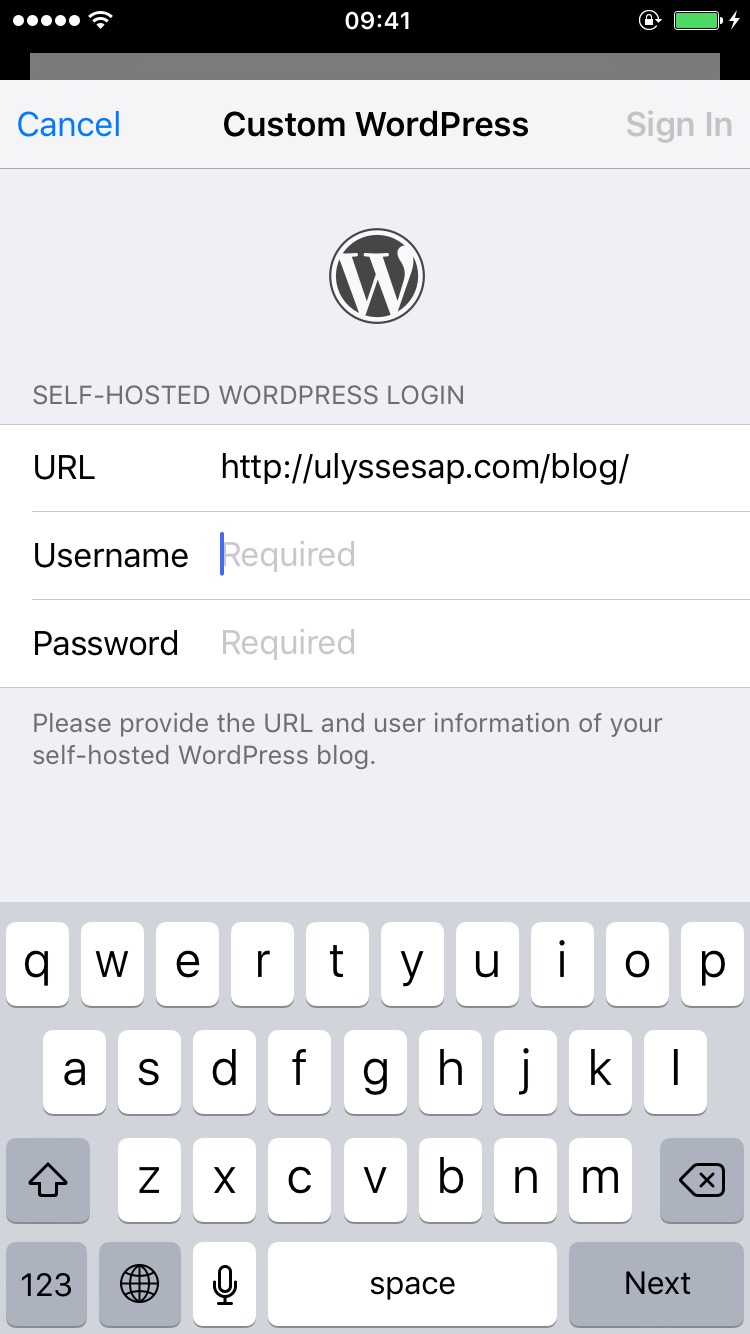
Now provide your WordPress username and password. Ulysses supports blogs hosted on WordPress.com as well as self-hosted installations. For the latter (“Custom WordPress”) you’ll also have to provide a URL.
You’re already set for publishing! From now on, whenever you consider a blog post finished, follow these steps:
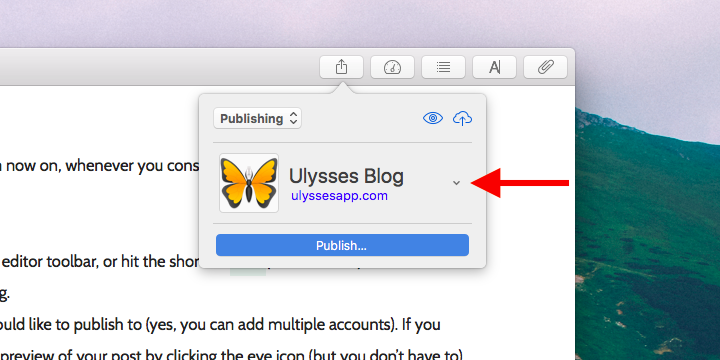
- Tap the Quick Export icon in the editor toolbar, or hit the shortcut
⌘6(command-6). - Switch the exporter to Publishing.
- Choose the blog account you would like to publish to (yes, you can add multiple accounts). If you want, you can display an in-app preview of your post by clicking the preview icon (the wide-open eye).
On iPad/iPhone
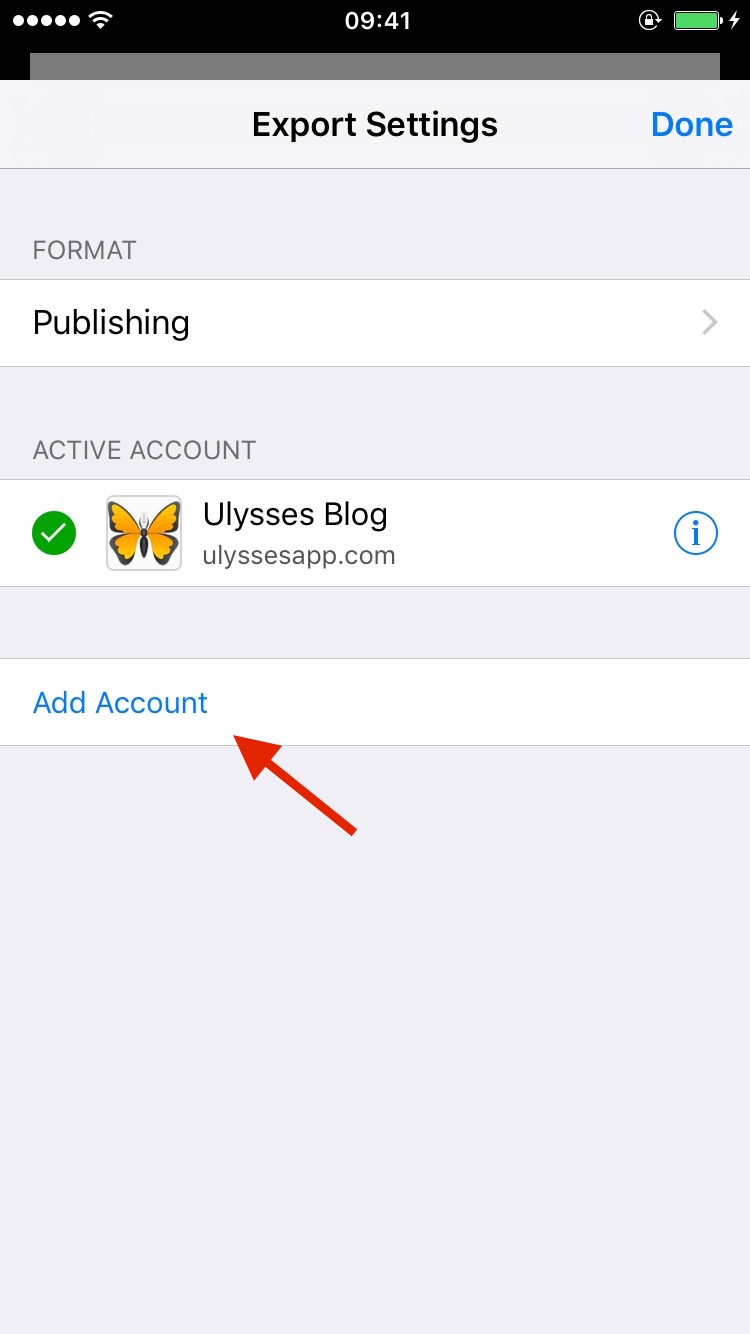
On iOS, you can add your account directly in the exporter: Just tap the Quick Export icon and switch to “Publishing”.

The steps for publishing a post:
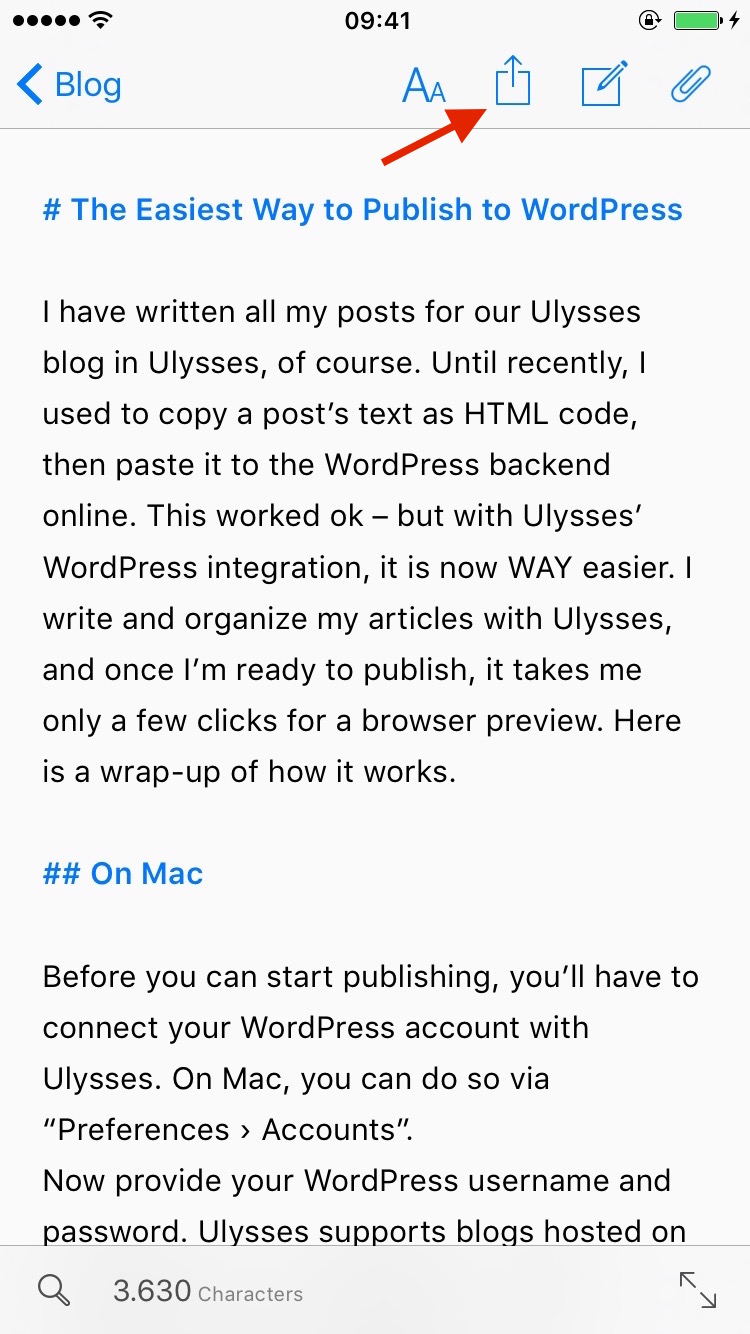
- Tap the Quick Export icon in the editor toolbar.
- Switch the exporter to Publishing.
- You’ll instantly get a preview of your post, where you can switch accounts in the toolbar.
- Now tap the arrow-to-cloud icon.
Settings
Before actually publishing your post, you can tweak a couple of settings:
You can schedule your post, or publish it right away. Also, you can set its status to “Draft” or “Published”. That is, if you schedule for “Immediately” and set the status to “Published”, your post will be publicly visible on your blog immediately after you publish it with Ulysses.
You can attach tags and categories to your posts. If you have used Ulysses keywords with your sheets, they will automatically be added as categories and/or tags as long as they correspond to categories and tags already in use on your WordPress blog.
You can add a featured image or an excerpt to your post.
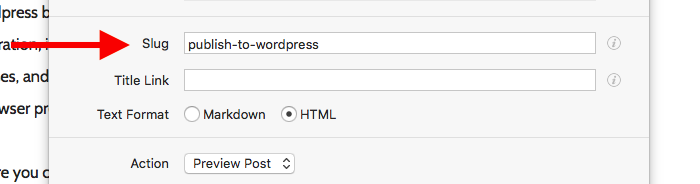
You can define the slug. That’s the URL of your blog post, essentially. If you don’t define it, the slug will be derived from your post’s title. As an example, the slug automatically derived from my title is “the-easiest-way-to-publish-to-wordpress“, but I set it to “publish-to-wordpress”.
Optionally, you can set a title link for your post. This makes sense if you use your blog for commenting on news in Daring Fireball style, and want your post title to directly link to the news’ sources (i.e. and external website). You can also create a title link directly during writing: Ulysses will automatically use any link you set on the first header as title link. Note: You can only take advantage of title links if you installed a dedicated WordPress plugin, e.g. this one.
Finally, decide what should happen after you push the Publish button (Action): You can either open a preview of the post in the browser, or open the WordPress backend for editing. If you choose “None”, your post will be uploaded to your blog, but you will stay where you are, in Ulysses.
Now, click or tap Publish – and you’re done. That’s it. Yes, it’s really that easy.
