What is new in the latest version of Ulysses for Mac? With a short series of blog posts, we’ll bring you up to date. Our start: the new Quick Export panel and how to make the most of it.
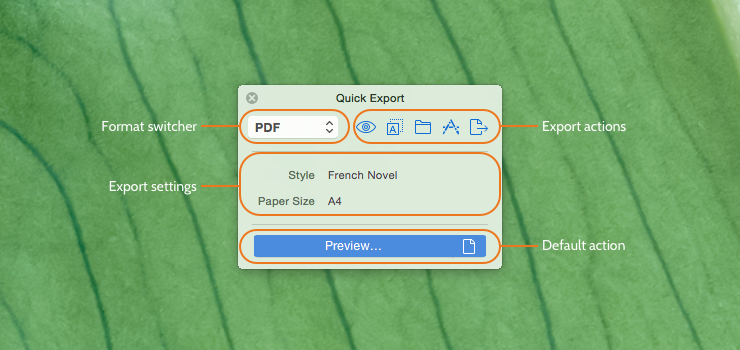
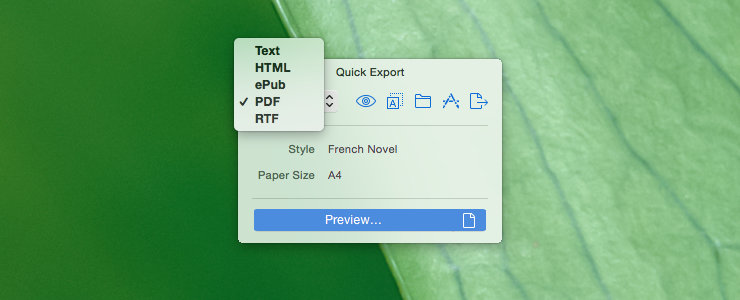
1. You can export to Text, HTML, ePub, PDF and RTF. Move your mouse over the format popup button top left to switch between them. Alternatively, you can use the up ↑ and down ↓ arrow keys to change the export format.
2. In the center of the panel you can specify the export settings, depending on the previously selected format: Plain Text or Markdown? HTML code snippet or full page? A4 or US Letter? Optimization for Word or for TextEdit? For ePub, you can add a title, an author and a cover image.
Here you can also select an export style for the formatting details (not available for Text export).
3. Now it is time to choose one of the available export actions represented by the icons top right:
 Preview to see what your exported document is going to look like
 Copy to clipboard
 Save to, to open Finder and save to a location of your choice
 Open in, lists all available applications for further processing of your output
 Send your output as mail or iMessage, share via Airdrop, print
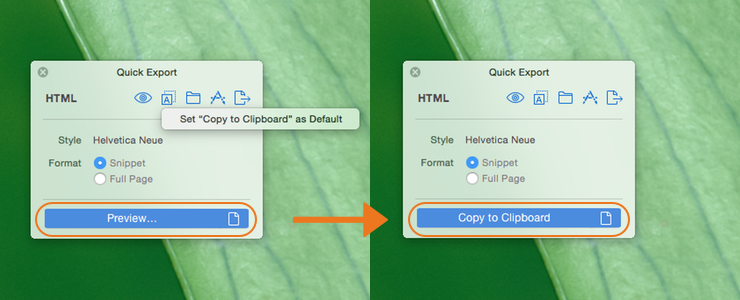
4. The large button at the bottom executes a default export action (you can also simply press Return). You should set this button to the action you use most (for example “Copy to clipboard” in HTML export). Right click on an icon to set the respective action as default, or switch actions with the tab key ⇥.
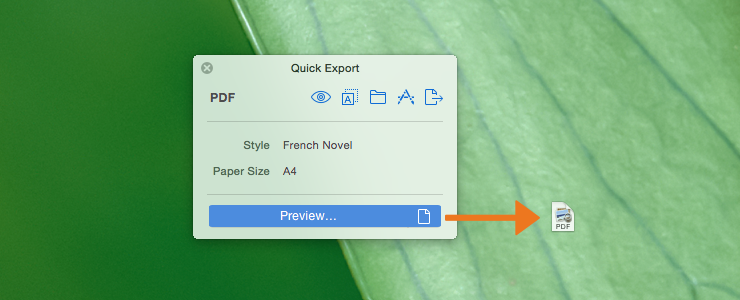
5. Have you seen the tiny page icon on the default button? Use it to drag and drop your file to a Finder window, on your desktop, into an email, etc.
Now you should be set. Happy exporting!