We’ve recently written a post about effectively using keywords. However, there is one extra trick that we’d like you to be aware of and thats the use of filters. Filters are very handy when it comes to keeping track of your writing progress. So, it’s time we take a closer look at this indispensable tool.
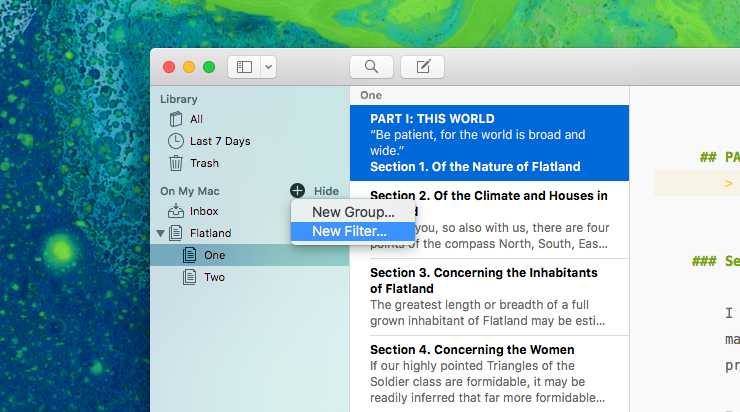
You can filter the sheets in every section, group or sub-group in your library. Adding filters can be done in three different ways. You can right-click on the group whose sheets you want to filter, or you can use the File Menu. Our preferred way of adding filters is to hover the mouse pointer over the section title and to click the + icon. Then, select “New Filter…”.
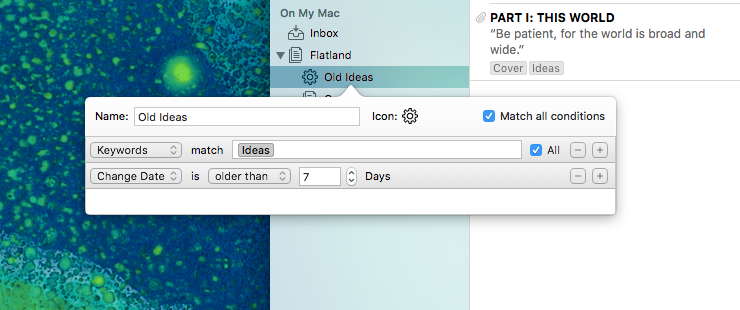
In the appearing popover, you can now choose a name and an icon. Furthermore, you can define the filter conditions. You can filter according to
- keywords
- change dates
- text inside the sheets
The filter option really comes in handy when combining several conditions. Let’s assume that you want to tell your recent works apart from older ones. To achieve this, you’ll first need to add condition that searches for all sheets with an appropriate keyword. Then, you’ll need to create a second condition that only includes works from the last week. To achieve the desired result, make sure to check Match all conditions in the upper part of the popover.
Any filter you assign to a certain group will filter all of the items and subgroups therein. What’s more, you can drag and drop them around in your library or right-click to duplicate them. Learning how to use filters can help you to effectively manage a large volume of text. Have fun filtering!