div.example-box { display: table; margin: 0px; } img.example-left-image { display: table-cell; margin-right: 1.5em !important; max-width: 280px; } img.example-right-image { display: table-cell; margin-left: 1.5em !important; max-width: 280px; } div.example-text { display: table-cell; vertical-align: middle; max-width: none; }
Sometimes I read that Ulysses is a focused-writing app. Well, yes – it is. And as such, it does a great job. But it is actually much more than just that.
One of Ulysses stand-out features is the vast array of export options. When it comes to getting your writing out there, Ulysses has your back. This is a first of a short series of posts exploring the exporting and the further processing of your Ulysses writings.
The Export Toolbox
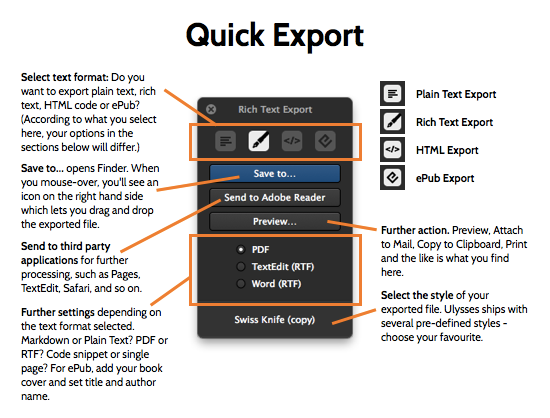
To get started, let’s have a look at Quick Export. Appearing simple and unassuming at first glance, it is in fact a well-stocked toolbox for your text processing needs.
There are severals ways to get to Quick Export:
- for keyboard junkies: shortcut CMD 6 (SIXport if you want a mnemonic)
- the small bent arrow in the upper right corner
- right click with the mouse on the sheet or group you wish to export
Quick Export works fine for single or multiple selected sheets at a time, groups and even for filters. Alright, let’s take a closer look at the philosophy behind Quick Export. Here’s an overview:
Exporting Use Cases
Quick Export is powerful. It offers a wide range of possibilities for getting your text out there, and it might be overwhelming at first glance. Fear not, though: Once you’ve found the right path, exporting will be a delightful experience. Let’s go through some examples:
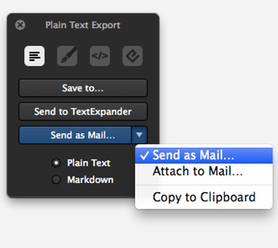
Send your text as mail. Activate the Plain Text export mode, choose Plain Text, select “Send as Mail…” – and you’re done.
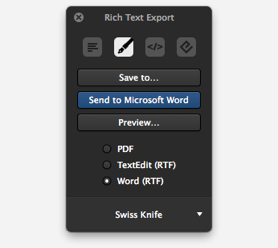
Tweaking format in Word. Let’s face it: Microsoft Word might not be great for writing, but it is an industry standard. And very probably it is the text processing software your grandfather (or publisher) is using. In Rich Text Export, choose Word (RTF) and select a format style. Use Preview to see what it will look like. Then send the result to Word. Heads up: From now on you’re on your own.
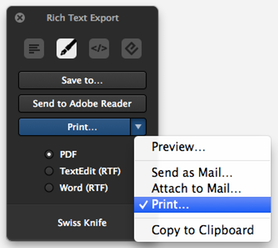
Save or print beautiful PDF documents. Select Rich Text Export, choose PDF, select a style, preview (or not), save or print the document. Look at this: I just exported the four pages of our introduction dealing with Quick Export. Just with a few clicks, really.
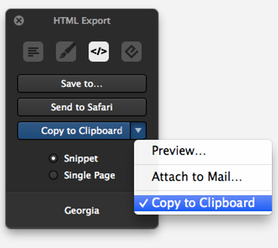
Feed your website or blog with proper HTML code. Select HTML Export, choose Snippet, use Copy to Clipboard and paste into your code editor or content management system.
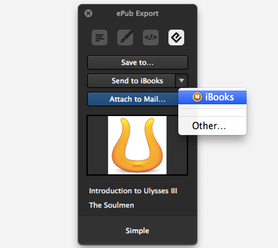
Become a book author. Don’t just dream about it, do it already! Select ePub Export, specify book title and author, add a cover image, select a style and send to iBooks. This is our introduction from within the app exported as ePub. Looks serious, doesn’t it?
These are only some appetizers. There are probably dozens of other things you will want to do with your texts and it’s pretty likely that you can do it with Ulysses. So if you’re not a proud owner of Ulysses yet, download the demo and give it a try.
Upcoming: Tweak Your Style
When it comes to formatting your output, you don’t have to rely on Ulysses’ built-in styles. In fact, you can create your own export style according to your taste and needs. Learn about how to use Ulysses Style Sheets in the next post of this series.